Embarking on a journey, whether a short road trip or a cross-country flight, often means leaving beloved kitchen gadgets behind. But for the avid baker, parting with a trusty cake pop maker isn’t always an option. If you’re wondering how to safely transport this delightful appliance without a hitch, you’ve come to the right place. Traveling with your cake pop maker is entirely feasible with the right preparation, ensuring you can whip up delicious treats wherever your adventures take you. This guide will walk you through everything you need to know, from navigating airport security to securely packing for a road trip, helping you become a seasoned pro at traveling with your favorite baking companion.
Understanding Travel Regulations for Small Appliances
Before packing your bags, it’s crucial to understand the rules governing appliance travel, especially if you’re flying. Knowing these guidelines ensures a smooth journey and avoids any unexpected holdups.
Air Travel: TSA Guidelines and Airline Policies
|
Our Picks for the Best Cake maker in 2026
As an Amazon Associate I earn from qualifying purchases.
|
||
| Num | Product | Action |
|---|---|---|
| 1 | Suuker Cake Cutter, Stainless Steel Cake Knife and Server with Double Handle, Adjustable Cake Slicer for Cake Server, Pie Server, Cake Cutting Set for Wedding |

|
| 2 | Stand Mixer, Kitchen in the box 3.2Qt Small Electric Food Mixer,6 Speeds Portable Lightweight Kitchen Mixer for Daily Use with Egg Whisk,Dough Hook,Flat Beater (Purple) |
|
| 3 | Cake Maker Lava Cake Maker Mini Donut Maker Waffle Maker Pancakes Maker Machine for Breakfast, Snacks, Desserts Non-stick Surface, Cake Machine, Double-sided Heating, Azure |
|
| 4 | Mini Cake Maker, Portable Mini Bundt Cake Maker Double-Sided Heating, electric cupcake makers for Breakfast, Cake, Snacks (Red) |
|
| 5 | Kitchen in the box Stand Mixer,3.2Qt Small Electric Food Mixer,6 Speeds Portable Lightweight Kitchen Mixer for Daily Use with Egg Whisk,Dough Hook,Flat Beater (Purplish-red) |
|
| 6 | Holstein Housewares Non-Stick 6-Count Electric Cupcake Maker Machine – Bakes 6 Cupcakes, Muffins, Pizza Cups, Cinnamon Buns – Perfect for Gifts, Birthdays, Holidays, or Bake Sales, Lavender |
|
| 7 | Kitchen in the box Stand Mixer,3.2Qt Mini Electric Food Mixer,6 Speeds Portable Lightweight Kitchen Mixer for Daily Use with Egg Whisk,Dough Hook,Flat Beater (Green) |
|
| 8 | Kitchen in the box Stand Mixer,3.2Qt Small Electric Food Mixer,6 Speeds Portable Lightweight Kitchen Mixer for Daily Use with Egg Whisk,Dough Hook,Flat Beater (Blue) |
|
| 9 | Kitchen in the box Stand Mixer,3.2Qt Small Electric Food Mixer,6 Speeds Portable Lightweight Kitchen Mixer for Daily Use with Egg Whisk,Dough Hook,Flat Beater (Black) |
|
| 10 | Joydeem Electric Dough Maker with Ferment Function, Microcomputer Timing, Face-up Touch Panel, 7.4Qt, 304 Stainless Steel, JD-HMJ7L |
|
When flying, your cake pop maker typically falls under the category of “small electrical appliances.” The good news is that most small appliances without sharp components are generally allowed in both carry-on and checked luggage.
For carry-on bags, the primary concern is fitting within your airline’s size and weight limits. The Transportation Security Administration (TSA) mainly focuses on items that might obstruct X-ray images, so be prepared for your cake pop maker to potentially require a separate inspection. It’s always a good practice to place it in an easily accessible part of your bag. If your cake pop maker has no sharp or pointed elements, it is generally permitted in your carry-on luggage, provided it adheres to the airline’s dimensions and weight restrictions for carry-on items.
If you opt for checked luggage, the weight limit becomes a more significant factor, as exceeding it can incur extra fees. Appliances packed in checked bags are subject to rougher handling, making robust packing essential. Most cake pop makers are corded and do not contain batteries, simplifying travel. However, if yours happens to be battery-powered, familiarize yourself with airline rules on lithium-ion batteries.
Road Trips: Securing Your Cake Pop Maker
Traveling by car offers more flexibility but still requires careful planning to protect your appliance. The main challenges for road trips are preventing movement, impacts, and exposure to extreme temperatures.
Secure your cake pop maker within your vehicle to prevent it from shifting during turns or sudden stops. Placing it in a stable position, such as on the floor behind a seat or snugly between other luggage, can help. Avoid placing it in direct sunlight for extended periods, especially on hot days, as extreme heat can potentially damage internal components or warp plastic parts. A cooler environment is always preferable.
Essential Packing Strategies for Your Cake Pop Maker
Proper packing is the cornerstone of safe appliance travel. Whether you’re flying or driving, investing a little time in careful preparation can save you headaches and potential damage.
Utilizing Original Packaging
The absolute best way to pack your cake pop maker is in its original box. Manufacturers design these boxes specifically to cradle the appliance, often including custom-fit Styrofoam or cardboard inserts that offer superior protection against bumps and vibrations. If you’ve held onto the original packaging, now is the time to retrieve it. This box is perfectly tailored to keep your appliance safe during transit.
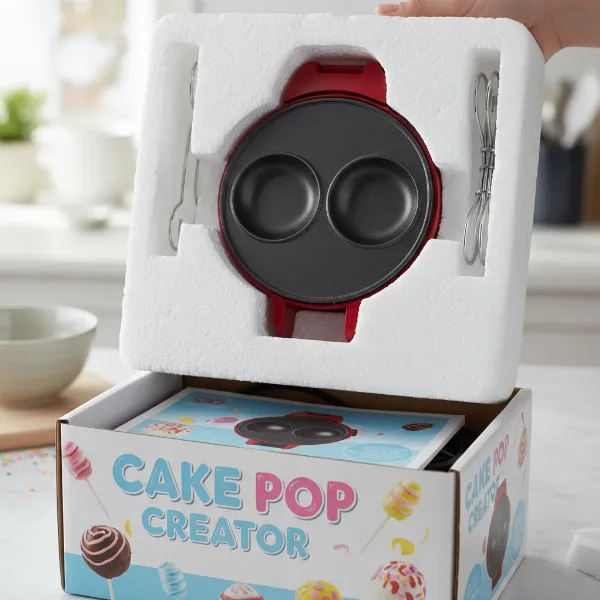 A cake pop maker carefully packed in its original box with custom foam inserts.
DIY Packing for Maximum Protection
If the original packaging is long gone, don’t fret! You can create effective DIY protection using readily available materials. Start by finding a sturdy cardboard box that is only slightly larger than your cake pop maker. A snug fit is crucial to prevent internal movement.
For padding, consider a combination of materials:
- Bubble wrap: Excellent for cushioning and absorbing shocks. Wrap the appliance completely in several layers.
- Packing paper or newspaper: Use crumpled paper to fill any empty spaces within the box, ensuring the cake pop maker can’t shift around.
- Towels or clothing: For car travel, you can strategically use clean towels or soft clothing as additional padding around the appliance inside its box, offering both protection and efficient use of luggage space.
Always secure any loose cords with twist ties or packing tape to prevent tangling or damage. If your cake pop maker has any removable parts, consider wrapping them separately and placing them alongside the main unit within the same box.
Specialized Travel Cases
For those who travel frequently with delicate kitchen gadgets, investing in a specialized hard-sided travel case can be a worthwhile consideration. These cases are designed for maximum durability, often featuring customizable foam inserts that can be shaped to fit your specific appliance perfectly, offering unparalleled protection against impacts and crushing. While a greater investment upfront, they provide peace of mind for the long haul.
Step-by-Step Packing Guide
Let’s break down the packing process into manageable steps to ensure your cake pop maker arrives in perfect condition.
Preparing Your Cake Pop Maker
First, make sure your cake pop maker is completely clean and cool before packing. Remove any residual batter or crumbs, and ensure the plates are dry. If your model has any detachable parts, such as removable plates, separate them and clean them thoroughly. This not only keeps your luggage clean but also prevents any unpleasant odors from developing during transit.
Wrapping and Cushioning
Once clean and cool, begin wrapping your appliance.
- Wrap the body: Encase the main unit of your cake pop maker in several layers of bubble wrap. Secure the bubble wrap with packing tape.
- Protect detachable parts: If you removed any plates or accessories, wrap each piece individually in bubble wrap or soft packing paper.
- Secure cords: Neatly coil the power cord and secure it with a twist tie or Velcro strap. You can tape the coiled cord directly to the wrapped appliance to keep everything together.
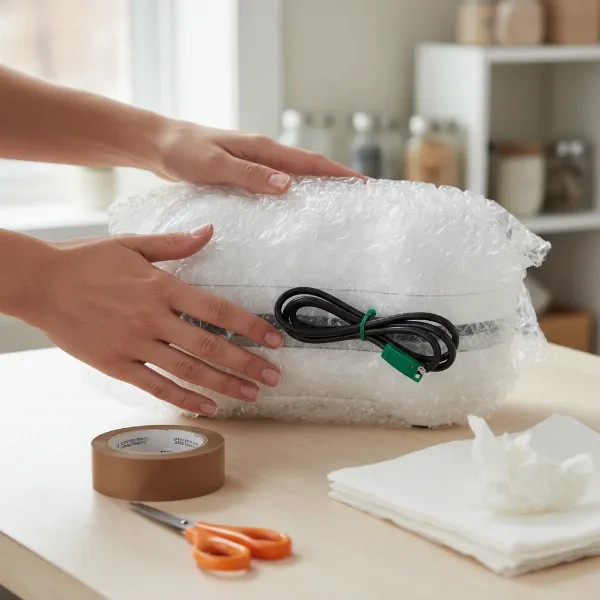 Hands wrapping a cake pop maker in bubble wrap, securing cords for travel protection.
Box Selection and Filling
With your cake pop maker wrapped, it’s time for the final boxing.
- Choose the right box: Select a sturdy cardboard box that allows for about 1-2 inches of space on all sides of the wrapped appliance.
- Create a base layer: Line the bottom of the box with a generous layer of crumpled packing paper, foam peanuts, or a thick layer of bubble wrap to absorb impact from below.
- Place the appliance: Gently place your wrapped cake pop maker, along with its individually wrapped parts, in the center of the box.
- Fill empty spaces: Fill all remaining gaps with more crumpled packing paper, foam peanuts, or even soft towels. The goal is to ensure the appliance cannot move around inside the box once sealed. Shake the box gently; if you hear or feel movement, add more padding.
- Seal the box: Securely close and tape the box using strong packing tape. Label the box “Fragile” and “This Side Up” for added precaution, although handlers may not always observe these warnings.
Maintenance Tips After Travel
Your journey doesn’t end when you arrive at your destination. A few simple steps upon arrival can ensure your cake pop maker remains in top working condition for many baking adventures to come.
Post-Travel Inspection
Once you’ve reached your destination, unpack your cake pop maker carefully. Before plugging it in, take a moment to inspect it for any visible damage. Check the exterior casing for cracks, ensure all parts are still securely attached, and visually examine the power cord for any fraying or damage. If you notice any significant issues, consult the manufacturer’s guidelines or a qualified technician before attempting to use the appliance.
Cleaning and Storage
Even if it was clean when packed, it’s a good idea to give your cake pop maker a quick wipe-down after travel, especially if it was stored for a long time or subjected to temperature fluctuations. Store it in a dry, cool place away from direct sunlight and extreme temperatures, preferably back in its protective packaging, ready for your next baking session.
Common Concerns and Quick Solutions
Traveling can throw curveballs, but with a little foresight, you can handle common travel concerns gracefully.
What if it gets damaged?
Despite your best efforts, sometimes damage can occur. If your cake pop maker is damaged during airline travel, immediately report it to the airline’s baggage claim department. Documentation (photos of the damage, original packaging) will be crucial for any potential claims. For car travel, personal insurance might cover it, depending on your policy.
Dealing with TSA inspections.
TSA agents might ask to inspect your cake pop maker more closely, especially if its shape appears unusual on the X-ray scanner. Remain calm and cooperative. You can politely explain what the item is. Having it easily accessible in your carry-on can expedite this process.
Traveling with cake pop ingredients.
While this guide focuses on the appliance, remember that traveling with ingredients has its own rules. Solid ingredients like dry mixes, sprinkles, and even solid chocolate are usually fine in carry-on or checked bags. However, liquid or gel-like ingredients (like frosting or extracts) are subject to the TSA’s 3-1-1 rule (containers 3.4 ounces or less, in one quart-sized bag, one bag per passenger) in carry-ons. Larger quantities must go in checked luggage. Always double-check specific ingredient rules if you plan to bring them along.
Conclusion
Traveling with your cake pop maker doesn’t have to be a daunting task. By understanding travel regulations, employing smart packing strategies, and performing a quick post-travel check, you can ensure your beloved appliance arrives safely and ready to create delightful treats. Whether it’s for a family vacation, a holiday gathering, or just a change of scenery for your baking endeavors, bringing your cake pop maker along opens up a world of possibilities. So pack smart, travel confidently, and get ready to pop some delicious cakes wherever your journey leads.
What exciting new destinations will you bake in with your portable cake pop maker?
Frequently Asked Questions
Can I bring a cake pop maker in my carry-on bag?
Yes, a cake pop maker without sharp elements is generally allowed in your carry-on bag, provided it fits within your airline’s size and weight restrictions. Be prepared for it to potentially undergo additional screening by TSA agents.
Is it better to pack my cake pop maker in checked luggage or a carry-on?
Both options are generally permissible. Carry-on offers more control and less risk of damage, but requires it to fit airline dimensions. Checked luggage allows for larger sizes but exposes the appliance to rougher handling, necessitating robust packing.
How should I secure the power cord of my cake pop maker for travel?
Neatly coil the power cord and secure it with a twist tie, Velcro strap, or even a piece of tape. This prevents tangling and damage to the cord or other items in your luggage.
Do I need to declare my cake pop maker to TSA?
You do not typically need to declare a cake pop maker to the TSA. However, be prepared for agents to potentially ask to inspect it more closely as it passes through the X-ray scanner.
Can I pack baking ingredients with my cake pop maker?
Solid baking ingredients (e.g., dry mixes, sprinkles) are generally allowed. Liquid or gel-like ingredients (e.g., frosting) must adhere to TSA’s 3-1-1 rule for carry-ons (containers 3.4 oz or less in a quart-sized bag) or be packed in checked luggage if larger.