Unlock the secret to irresistible, perfectly portioned brownie bites with the help of your mini cake maker. If you’ve ever craved a quick, warm, and gooey chocolate treat without the fuss of a full oven, this guide is for you. We’ll dive into everything from preparing your batter to mastering the art of baking these delightful morsels, ensuring every bite is a little piece of fudgy heaven. Get ready to transform your baking routine and impress everyone with these homemade delights.
Understanding Your Mini Cake Maker for Brownie Bites
A mini cake maker, often resembling a cake pop maker or a specialized mini cupcake machine, is a fantastic appliance for creating bite-sized treats with minimal effort. Its compact design and rapid heating capabilities make it ideal for small-batch baking, offering a significant advantage over traditional oven methods. You’ll find that baking brownie bites in these devices is not only faster but also provides consistent results, giving each piece those coveted crispy edges and a moist, fudgy interior. The convenience of easy cleanup and quick turnaround times makes these mini appliances a favorite for spontaneous dessert cravings and effortless entertaining.
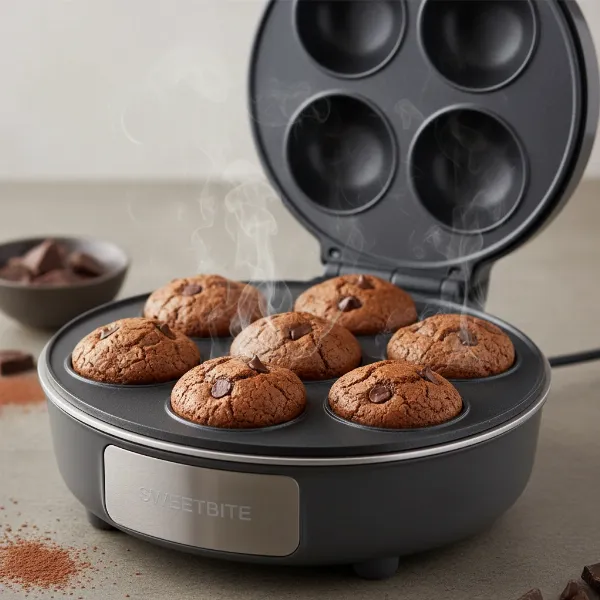 Close-up of a mini cake maker with brownie bites baking inside.
Essential Ingredients for Delicious Brownie Bites
Crafting delicious brownie bites begins with selecting your ingredients. You have the flexibility to use a high-quality boxed brownie mix for ultimate convenience, simply following the package instructions for preparation. Alternatively, for those who prefer baking from scratch, classic brownie ingredients like flour, cocoa powder, sugar, eggs, butter, and vanilla extract will yield a rich, deeply chocolatey flavor. Don’t shy away from experimenting with mix-ins and flavor variations. Chocolate chips, white chocolate chunks, chopped nuts (like walnuts or pecans), or even a swirl of peanut butter can elevate your brownie bites, adding delightful textures and complementary flavors. Ensure all ingredients are at room temperature for optimal mixing and baking results.
Step-by-Step Guide to Making Brownie Bites
Making brownie bites in your mini cake maker is a straightforward process that yields delightful results. Follow these steps for perfect consistency and flavor every time.
Preparing Your Mini Cake Maker
|
Our Picks for the Best Cake maker in 2026
As an Amazon Associate I earn from qualifying purchases.
|
||
| Num | Product | Action |
|---|---|---|
| 1 | Suuker Cake Cutter, Stainless Steel Cake Knife and Server with Double Handle, Adjustable Cake Slicer for Cake Server, Pie Server, Cake Cutting Set for Wedding |

|
| 2 | Kitchen in the box Stand Mixer,3.2Qt Mini Electric Food Mixer,6 Speeds Portable Lightweight Kitchen Mixer for Daily Use with Egg Whisk,Dough Hook,Flat Beater (Green) |
|
| 3 | Joydeem Electric Dough Maker with Ferment Function, Microcomputer Timing, Face-up Touch Panel, 7.4Qt, 304 Stainless Steel, JD-HMJ7L |
|
| 4 | Mini Cake Maker, Portable Mini Bundt Cake Maker Double-Sided Heating, electric cupcake makers for Breakfast, Cake, Snacks (Red) |
|
| 5 | Kitchen in the box Stand Mixer,3.2Qt Small Electric Food Mixer,6 Speeds Portable Lightweight Kitchen Mixer for Daily Use with Egg Whisk,Dough Hook,Flat Beater (Black) |
|
| 6 | Stand Mixer, Kitchen in the box 3.2Qt Small Electric Food Mixer,6 Speeds Portable Lightweight Kitchen Mixer for Daily Use with Egg Whisk,Dough Hook,Flat Beater (Purple) |
|
| 7 | Kitchen in the box Stand Mixer,3.2Qt Small Electric Food Mixer,6 Speeds Portable Lightweight Kitchen Mixer for Daily Use with Egg Whisk,Dough Hook,Flat Beater (Blue) |
|
| 8 | Kitchen in the box Stand Mixer,3.2Qt Small Electric Food Mixer,6 Speeds Portable Lightweight Kitchen Mixer for Daily Use with Egg Whisk,Dough Hook,Flat Beater (Purplish-red) |
|
| 9 | Cake Maker Lava Cake Maker Mini Donut Maker Waffle Maker Pancakes Maker Machine for Breakfast, Snacks, Desserts Non-stick Surface, Cake Machine, Double-sided Heating, Azure |
|
| 10 | Holstein Housewares Non-Stick 6-Count Electric Cupcake Maker Machine – Bakes 6 Cupcakes, Muffins, Pizza Cups, Cinnamon Buns – Perfect for Gifts, Birthdays, Holidays, or Bake Sales, Lavender |
|
Before you begin, ensure your mini cake maker is clean and ready for use. Plug in the appliance and allow it to preheat according to the manufacturer’s instructions, typically indicated by a light changing color. While it heats up, lightly spray or brush the cooking plates with a non-stick cooking spray or a thin layer of oil. This crucial step prevents the brownie bites from sticking and ensures easy removal.
Mixing the Brownie Batter
If using a boxed mix, prepare the batter as directed on the package. For a homemade recipe, combine your wet ingredients (melted butter, sugar, eggs, vanilla) thoroughly before gradually incorporating the dry ingredients (flour, cocoa powder, salt, baking powder). Mix just until combined; overmixing can lead to tough brownies. If adding any mix-ins like chocolate chips or nuts, gently fold them into the batter at this stage. The batter should have a thick, consistent texture.
Filling the Cavities
This step requires a steady hand. For best results and to prevent spills, transfer your brownie batter into a squeeze bottle, a piping bag, or a large Ziploc bag with a corner snipped off. Carefully fill each cavity of your preheated mini cake maker, aiming for about two-thirds to three-quarters full. Avoid overfilling, as the batter will expand during baking, and too much batter can lead to overflow and messy cleanup.
Baking for Perfection
Once the cavities are filled, close the lid of your mini cake maker. The baking time will vary depending on your specific appliance and the desired level of doneness, but typically ranges from 8 to 15 minutes. It’s a good idea to bake a test batch of one or two bites first to determine the optimal cooking time for your machine. To check if they’re done, gently open the lid and insert a toothpick into the center of a brownie bite; if it comes out clean or with a few moist crumbs, they are ready.
Cooling and Serving Your Bites
Once baked, carefully remove the brownie bites from the mini cake maker using a non-scratch utensil, such as a silicone spatula. Transfer them to a wire cooling rack to cool completely. While it’s tempting to enjoy them immediately, allowing them to cool slightly helps them set and prevents them from falling apart. Once cooled, they are ready to be served plain, dusted with powdered sugar, or adorned with your favorite toppings.
Choosing the Right Mini Cake Maker
Selecting the appropriate mini cake maker can enhance your brownie bite experience. Consider the capacity, as some models make a dozen bites at once, while others may produce fewer. A non-stick surface is paramount for easy release and quick cleaning, making silicone or high-quality coated plates preferable. Size and storage are also important factors; choose a compact model if kitchen space is limited. While often marketed as “cake pop makers” or “mini cupcake makers,” these appliances are perfectly versatile for brownie bites. Look for brands known for consistent heating and durable construction to ensure a long-lasting and reliable baking companion.
Troubleshooting Common Brownie Bite Issues
Even seasoned bakers encounter challenges, but most brownie bite issues are easily remedied. If your brownie bites are sticking, ensure you’ve thoroughly greased the cavities before adding batter, and consider using a little more oil or cooking spray. For uneven baking, rotate the brownie bites if your machine allows, or adjust the baking time slightly. To achieve a perfectly fudgy texture, avoid overbaking; the toothpick test should show moist crumbs, not a completely dry toothpick. If they’re too cakey, you might be adding too much leavening agent (like baking powder) or overmixing the batter. Experimentation is key to mastering your specific mini cake maker.
Creative Ideas and Toppings for Your Brownie Bites
Once your brownie bites are baked, the fun truly begins with creative embellishments. A simple dusting of powdered sugar adds an elegant touch, while a drizzle of melted chocolate, caramel, or white chocolate creates a beautiful and delicious finish. For a pop of color and texture, sprinkle with mini chocolate chips, colorful sprinkles, or chopped nuts. You can also press a small piece of chocolate or a mini marshmallow into the center of each bite immediately after baking for a molten surprise. Serve them with a scoop of vanilla ice cream, a dollop of whipped cream, or alongside a hot cup of coffee for an ultimate dessert experience.
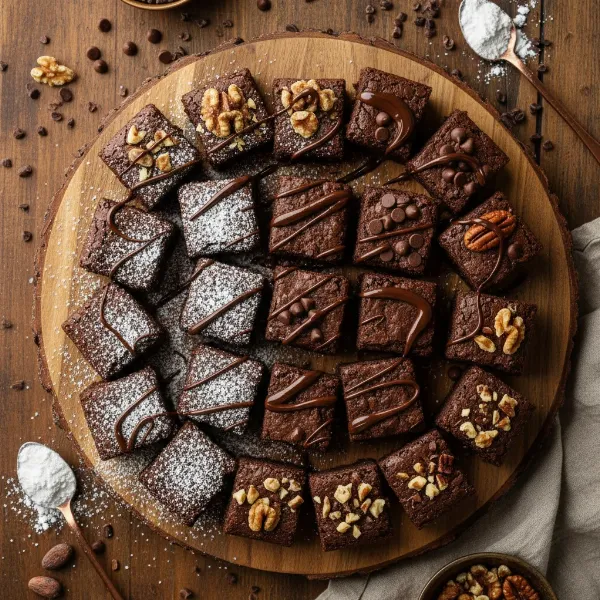 Assortment of decorated brownie bites on a serving platter with various toppings.
Care and Maintenance for Your Mini Cake Maker
Proper care ensures the longevity and performance of your mini cake maker. Always allow the appliance to cool completely before cleaning. Use a damp cloth or sponge to wipe down the non-stick cooking plates, avoiding abrasive scrubbers or harsh detergents that could damage the surface. For stubborn residue, a soft brush can be helpful. Never submerge the electrical unit in water. Once clean and dry, store your mini cake maker in a cool, dry place, ideally in its original box or a designated cupboard to protect it from dust and scratches. Regular cleaning after each use will keep it in prime condition for countless batches of brownie bites.
Expert Tips for Brownie Bite Success
Achieving perfect brownie bites consistently involves a few expert tricks. Always preheat your mini cake maker fully before adding batter; this ensures even cooking from the start. Don’t overfill the cavities; a two-thirds full measure is usually ideal to prevent overflow and ensure a good shape. For an extra fudgy bite, slightly underbake them, letting the residual heat finish the cooking process as they cool. If you’re using a box mix, consider adding an extra egg yolk or a tablespoon of melted butter to enhance richness and moisture. A squeeze bottle or piping bag makes filling much neater and more efficient, particularly for small cavities.
Latest Trends in Mini Dessert Making
The world of mini desserts is always evolving, with new trends constantly emerging. In brownie bites, we’re seeing a rise in gourmet flavor combinations, such as salted caramel, raspberry swirl, or even spicy chili chocolate. Gluten-free and vegan brownie bite recipes are also gaining popularity, catering to diverse dietary needs without compromising on taste. Innovative decorating techniques, like ombré frosting or intricate edible glitter designs, are transforming these simple treats into miniature works of art. The emphasis remains on quality ingredients and creative presentation, making mini desserts a versatile and exciting category for home bakers.
Understanding Brownie Bite Pricing and Brands
The cost of making brownie bites can vary. A basic boxed brownie mix is quite affordable, while scratch-made recipes might incur slightly higher costs depending on the quality of ingredients like cocoa and chocolate. Mini cake makers themselves range from budget-friendly options around $20-30 to more robust models costing $50 or more. Popular brands like Dash, Babycakes, Nostalgia, and Brentwood offer reliable mini cake makers designed for convenience and consistent results. Investing in a good quality, non-stick appliance will save you time and frustration in the long run.
Where to Find Your Perfect Mini Cake Maker
Finding the right mini cake maker is easier than ever. Major electronics stores and home goods retailers often carry a selection of these compact appliances, allowing you to see different models in person. Online marketplaces like Amazon, Walmart, and Target offer an even wider variety, often with customer reviews that can help guide your decision. When purchasing online, pay close attention to product specifications, reviews regarding non-stick performance, and ease of cleaning. Look for models specifically designed for “cake pops” or “mini cupcakes” as these are best suited for brownie bites, ensuring you get an appliance that perfectly fits your baking needs.
Conclusion
Making delicious brownie bites in a mini cake maker is a fun, fast, and incredibly rewarding baking endeavor. From choosing your favorite mix or crafting a homemade batter to mastering the perfect bake and adding creative toppings, this method simplifies the process while delivering perfectly portioned, fudgy treats every time. Embrace the convenience and versatility of your mini cake maker to satisfy your sweet tooth or delight guests with these adorable and delectable bites. What exciting flavor combinations will you try first in your next batch of brownie bites?
Frequently Asked Questions
Can I use any brownie mix for a mini cake maker?
Yes, most standard boxed brownie mixes work wonderfully in a mini cake maker. Simply prepare the batter according to the package directions, ensuring it’s not too thick to pour easily into the cavities.
How long do brownie bites take to bake in a mini cake maker?
Baking times typically range from 8 to 15 minutes, depending on your specific appliance model and the desired fudginess. It’s best to test a small batch first to find the optimal time for your machine.
How do I prevent brownie bites from sticking to the mini cake maker?
Always preheat your mini Cake Maker fully and generously spray or brush the cavities with a non-stick cooking spray or oil before adding the batter. A good quality non-stick surface on your appliance also helps immensely.
Can I make brownie bites without a mini cake maker?
Absolutely! You can use a mini muffin tin baked in a conventional oven, adjusting the baking time to around 10-15 minutes, or until a toothpick inserted comes out with moist crumbs.
What’s the best way to store homemade brownie bites?
Store cooled brownie bites in an airtight container at room temperature for up to 3-4 days to maintain their freshness and fudgy texture. For longer storage, they can be frozen for up to 2-3 months.