In the world of home baking, few gadgets have sparked as much excitement as the cake pop maker. These delightful little treats—mini spheres of cake on a stick—have become party staples, wedding favors, and everyday indulgences. If you’re wondering whether a cake pop maker deserves a spot in your kitchen, this comprehensive cake pop maker review will break it down for you. From setup to troubleshooting, we’ll cover everything you need to know to make informed decisions and create mouthwatering results. Whether you’re a baking novice or a seasoned pro, a cake pop maker can transform your baking game.
Imagine whipping up a batch of perfectly round cake pops in minutes, without the mess of crumbling cakes and mixing in frosting. That’s the promise of a good cake pop maker, and after testing various models, I can say it’s largely delivered. In this cake pop maker review, we’ll explore the best cake maker guide principles applied to these compact appliances, ensuring you get the most out of your investment.
Understanding the Cake Pop Maker: What It Is and Why You Need One
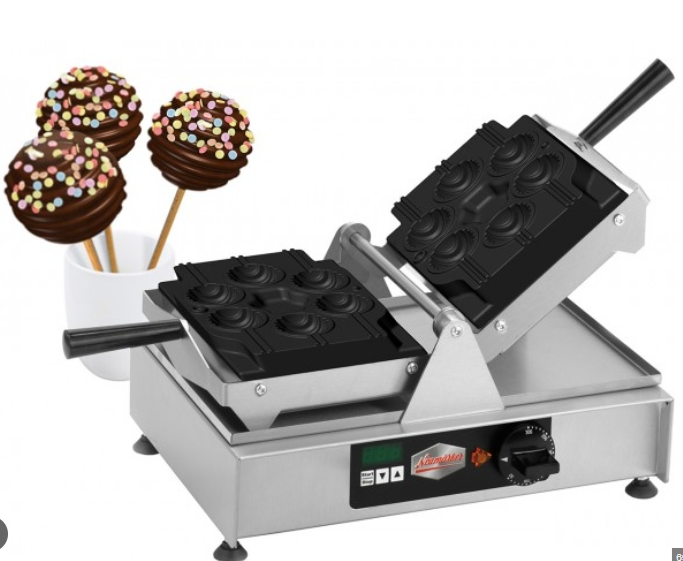
A cake pop maker is essentially a mini oven designed specifically for baking small, spherical cakes. Unlike traditional methods that involve baking a full cake, crumbling it, and shaping it with binders like frosting, a cake pop maker bakes the batter directly into pops. This results in a lighter, fluffier texture that’s more like bite-sized pieces of actual cake rather than the denser, sometimes mushy consistency of handmade versions.
Why choose a cake pop maker? For starters, it’s incredibly convenient for parties and events. You can produce dozens of pops quickly, customize flavors endlessly, and present them in fun, portable ways. Plus, many models are portable, making them ideal for on-the-go baking or small kitchens. In my experience, the ease of use turns baking into a family activity—kids love watching the pops rise and helping with decorations.
But not all cake pop makers are created equal. Key features to look for include non-stick surfaces for easy release, indicator lights for perfect timing, and included accessories like sticks and stands. A solid cake pop maker should heat evenly to avoid undercooked centers or burnt edges. If you’re setting up your first cake maker setup, start with a basic model that includes recipes to build confidence.
Cake Maker Setup: Getting Your Cake Pop Maker Ready
Setting up your cake pop maker is straightforward, but a proper cake maker setup ensures longevity and optimal performance. Begin by unboxing and washing all removable parts—most models have non-stick plates that wipe clean with a damp cloth. Avoid submerging the base in water to protect the heating elements.
Place your cake pop maker on a flat, heat-resistant surface away from edges to prevent accidental spills. Plug it in and let it preheat for 5-10 minutes; the power light will signal when it’s ready. For the first use, lightly grease the molds with cooking spray or oil. This prevents sticking and makes cleanup a breeze. Pro tip: Use a piping bag to fill the molds precisely—about one tablespoon per pop—to avoid overflow.
In terms of portable cake maker benefits, these devices store easily in cabinets and weigh little, so you can move them around without hassle. Once set up, your cake pop maker is primed for action. For more detailed baking guide steps, consider exploring comprehensive resources that emphasize safety and precision.
How to Use a Cake Pop Maker: Step-by-Step Baking Guide
Now for the fun part: how to use a cake pop maker. Start with a simple batter—mix flour, sugar, eggs, milk, and baking powder as per the included recipes. For variety, experiment with chocolate, vanilla, or even savory options like cheese bites.
Preheat your cake pop maker, fill the molds without overfilling, and close the lid gently. Bake for 4-6 minutes, depending on the model and batter thickness. The indicator light or a toothpick test will confirm doneness. Use the provided fork tool to pop out the treats onto a cooling rack. Insert sticks once cooled, then dip in melted chocolate or icing for that classic look.
Cake pop maker tips abound: Always use room-temperature ingredients for even baking, and don’t peek mid-cycle to maintain heat. For fluffier pops, sift dry ingredients to incorporate air. If you’re new to this, practice with a small batch. The process is forgiving, but mastering how to bake with a cake maker like this one elevates your results from good to gourmet.
One standout aspect in this cake pop maker review is the speed— a full batch of 9-12 pops in under 10 minutes total. It’s a game-changer for last-minute desserts.
Pros and Cons of Popular Cake Pop Makers
In evaluating various cake pop makers, the pros shine through. Non-stick coatings make release effortless, reducing waste and frustration. Compact designs fit small spaces, and quick cooking times (2-4 minutes per side) mean less waiting. Users rave about the authentic cake taste—no frosting needed, so pops stay light and flavorful. Accessories like decorating stands add value, turning baking into a complete experience.
On the flip side, some models show a seam where the molds meet, giving pops a slight ridge—not ideal for perfectionists. Overfilling can lead to leaks, and handles may heat up, requiring oven mitts. Durability varies; cheaper units might overheat after multiple batches. However, with proper cake maker maintenance, most last for years.
Overall, the convenience outweighs minor drawbacks, especially for frequent bakers. This cake pop maker review confirms they’re worth it for anyone who loves creative treats.
Comparing Cake Pop Makers to Traditional Methods
Traditional cake pops involve baking, crumbling, and binding—messy and time-intensive. A cake pop maker skips that, offering cleaner, faster results with better texture. While handmade allows more size control, the maker ensures uniformity. For events, the portable cake maker wins hands-down.
Cake Maker Troubleshooting: Common Issues and Fixes
Even the best cake pop maker can hit snags. If pops stick, ensure thorough greasing and full preheating. Uneven baking? Check for level placement and even batter distribution. If they don’t fill completely, your batter might be too thick—add a splash of milk.
For burnt edges, reduce time by 30 seconds or lower heat if adjustable. Overflows happen with wet batters; use less filling next time. In cake maker troubleshooting, remember: Cool between batches to prevent overheating. If the light doesn’t turn on, check the cord or outlet. Most issues stem from user error, so consult your manual. With these cake pop maker tips, you’ll rarely face problems.
Cake Maker Cleaning and Maintenance: Keep It Lasting
Post-baking, cake maker cleaning is simple: Unplug and cool completely. Wipe plates with a soft cloth and mild soap—never abrasive scrubbers on non-stick surfaces. For stubborn residue, a damp paper towel works wonders. Store in a dry place to avoid moisture buildup.
Cake maker maintenance includes periodic checks for wear. Wipe the exterior regularly and ensure vents are dust-free. Avoid stacking heavy items on top. For longevity, use wooden or plastic tools only—no metal that could scratch. Following these steps keeps your cake pop maker performing like new. Detailed maintenance tips can further enhance your appliance’s life.
Cake Maker Safety: Essential Precautions
Safety first with any hot appliance. Always unplug before cleaning or moving. Use mitts for hot handles and keep away from children during operation. Place on stable surfaces to prevent tipping, and never immerse in water.
Cake maker safety extends to batter handling—avoid raw egg consumption. For portable cake maker use, ensure cords don’t dangle. Overheating? Unplug immediately. These habits prevent accidents, letting you focus on fun.
Creative Ideas and Cake Maker Tips for Success
Beyond basics, how to bake with a cake maker opens endless possibilities. Try red velvet for holidays, lemon for showers, or brownie batter for chocolate lovers. Savory pops with herbs and cheese impress at brunches. Decorate with sprinkles, nuts, or drizzles for visual appeal.
Cake pop maker tips: Chill dipped pops for set coatings. Use gel food coloring for vibrant hues without thinning batter. For events, bake ahead and freeze undecorated pops. Experiment with extracts like almond or peppermint. The versatility makes it a kitchen essential.
Final Thoughts on the Cake Pop Maker
In this in-depth cake pop maker review, it’s clear these gadgets deliver joy and simplicity to baking. From easy cake maker setup to creative how to use a cake maker techniques, they simplify treat-making without sacrificing quality. While minor troubleshooting arises, proper cake maker cleaning and cake maker maintenance keep things smooth. Prioritizing cake maker safety ensures worry-free use, and with portable cake maker designs, accessibility is unmatched.
If you’re ready to elevate your baking, a cake pop maker is a smart choice. Dive into the best cake maker guide for more inspiration, and start popping up perfection today. Your parties—and taste buds—will thank you.