For bakers seeking convenience and creativity, a cake maker with accessories is a must-have kitchen tool. These compact appliances come equipped with everything you need to create perfect cakes, cupcakes, or cake pops, making them ideal for beginners and seasoned bakers alike. In this comprehensive cake maker with accessories review, we’ll explore the benefits, setup, usage, and tips for getting the most out of these all-in-one baking solutions. Drawing from the best cake maker guide, this guide will help you choose the perfect cake maker with accessories for your kitchen.
Picture baking a batch of uniform cake pops or mini cupcakes in minutes, complete with tools to decorate and display your creations. A cake maker with accessories simplifies the process with included extras like piping bags, cooling racks, and sticks, ensuring a professional finish without extra purchases. Whether you’re hosting a party or experimenting at home, these devices make baking accessible, fun, and mess-free.
What Is a Cake Maker with Accessories?
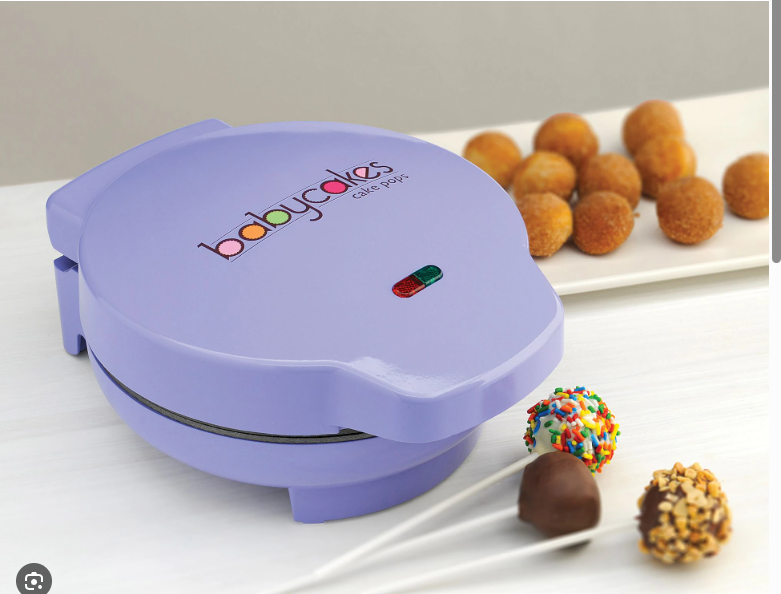
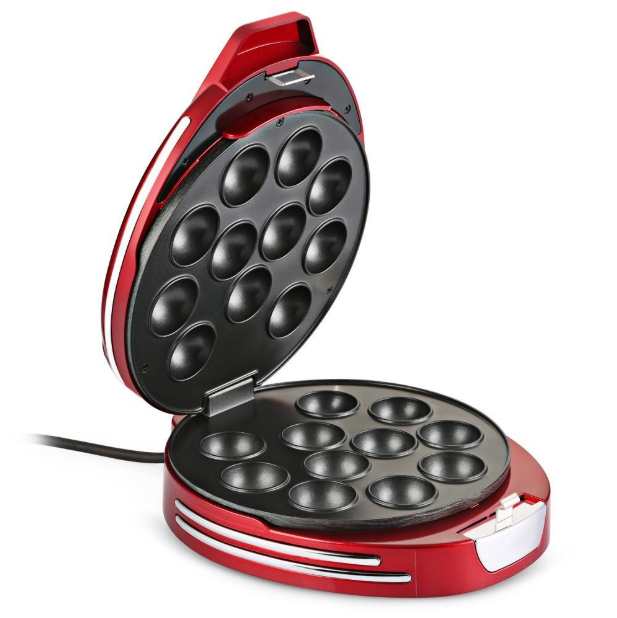
A cake maker with accessories is a compact, electric appliance designed to bake small cakes, cupcakes, or cake pops, bundled with tools to enhance the baking and decorating process. Accessories often include lollipop sticks, cooling racks, fork tools for easy removal, recipe booklets, and sometimes piping bags or decorating tips for icing and embellishments. These machines feature non-stick molds, simple controls, and quick heating, making them perfect for small batches and portable use.
The appeal lies in the all-in-one convenience. Instead of buying separate tools, you get everything needed to bake and decorate. Many models, like those from Babycakes or Brentwood, are lightweight (2-4 pounds) and compact, qualifying as a portable cake maker. They produce 6-12 treats in 4-8 minutes, saving time and energy compared to ovens. Look for models with non-stick plates, indicator lights, and durable accessories like stainless steel piping tips or reusable silicone molds for added value.
Cake Maker Setup: Getting Started with Your Accessories
Setting up a cake maker with accessories is simple, ensuring you’re baking in no time. Unbox the unit and check for all components: the main appliance, non-stick plates, power cord, and accessories like sticks, racks, or piping bags. Wash removable plates and tools with warm, soapy water to remove any residue, then dry thoroughly.
Place the cake maker on a flat, heat-resistant surface, keeping it away from edges to avoid tipping. Plug it in and turn it on—most models preheat in 3-5 minutes, signaled by a ready light. Lightly grease the molds with cooking spray or oil to ensure easy release, a key step in cake maker setup. Organize accessories like piping bags or decorating tips nearby for seamless workflow.
The portable cake maker design, often under 10 inches wide, fits small spaces and includes cord wraps for easy storage or travel. For first-time use, run an empty cycle to eliminate manufacturing odors. Refer to the included recipe booklet or the baking guide for setup tips tailored to your model.
How to Use a Cake Maker: Baking and Decorating with Accessories
Learning how to use a cake maker with accessories is straightforward, especially with the included tools. Start with a simple batter recipe from the provided booklet—vanilla or chocolate mixes are great for beginners. Combine flour, sugar, eggs, milk, and baking powder until smooth. The included measuring cup ensures accurate portions.
Preheat the cake maker until the indicator light signals readiness. Use a piping bag (often included) or spoon to fill molds two-thirds full to prevent overflow. Close the lid and bake for 4-7 minutes, checking doneness with a toothpick. Use the fork tool to remove treats, then cool them on the provided rack. For cake pops, insert the included lollipop sticks after slight cooling, then decorate using piping tips for icing or sprinkles from accessory kits.
Cake maker tips: Use room-temperature ingredients for even mixing, and practice with the piping bag for precise designs. The included accessories, like stainless steel nozzles or silicone molds, make decorating easy—try simple swirls or shapes to start. This cake maker with accessories setup produces 6-12 treats in under 10 minutes, perfect for quick desserts or parties.
Pros and Cons of a Cake Maker with Accessories
In this cake maker with accessories review, the benefits shine. The included tools—like lollipop sticks, cooling racks, and piping bags—eliminate the need for extra purchases, saving time and money. Non-stick molds ensure easy release, and the compact, portable cake maker design fits small kitchens or travel bags. Fast baking (4-8 minutes) and accessories like recipe booklets make it beginner-friendly, while models like the Babycakes CP-12 offer 12 cake pops per batch for efficient output.
Cons include limited mold sizes, which may restrict larger cakes. Some budget models have flimsy accessories, like plastic piping tips that wear quickly. Overheating can occur with back-to-back batches, so allow cooling breaks. Despite these, the all-in-one convenience and portability make these devices a top choice for versatile baking.
Compared to traditional baking, a cake maker with accessories simplifies the process, eliminating the need for crumbling cakes or buying separate tools. It’s ideal for quick, uniform treats, especially for events.
Cake Maker with Accessories vs. Manual Methods
Traditional cake pop making involves baking, crumbling, and shaping with frosting—messy and time-intensive. A cake maker with accessories bakes directly into molds, producing lighter treats in minutes. The included tools streamline decorating, making it faster and more professional than hand-shaping, perfect for beginners or busy bakers.
Cake Maker Troubleshooting: Solving Issues with Ease
Cake maker troubleshooting is simple, even with accessories. If treats stick, ensure molds are greased and preheated fully—underheating is a common issue. Uneven baking? Check for level placement and even batter distribution using the included measuring tools. Undercooked centers may need 1-2 extra minutes; test with a toothpick.
Burnt edges suggest overfilled molds or prolonged preheating—use less batter or adjust timing. If accessories like piping bags clog, rinse them immediately after use to prevent dried icing blockages. For machine failure, check the cord and outlet. These cake maker tips keep your cake maker with accessories running smoothly, with the manual offering model-specific fixes.
Cake Maker Cleaning: Maintaining Your Machine and Accessories
Cake maker cleaning is quick with a cake maker with accessories. After unplugging and cooling, wipe non-stick plates with a damp cloth and mild soap, avoiding abrasive scrubbers to protect the coating. Clean accessories like piping bags, nozzles, and racks with warm, soapy water, ensuring no batter hardens inside tips. Some plates are dishwasher-safe—check your manual.
Wipe the exterior with a soft cloth, keeping liquid away from vents. Dry all parts thoroughly before storing to prevent moisture buildup. The compact design simplifies cake maker cleaning, and proper care of accessories ensures they remain functional for future bakes.
Cake Maker Maintenance: Keeping Your Device and Tools in Top Shape
Cake maker maintenance extends the life of your cake maker with accessories. Regularly inspect the power cord for wear and keep vents dust-free for airflow. Use only plastic or wooden tools from the accessory kit to avoid scratching molds. Store the unit and accessories in a dry, cool place, using included storage bags for small parts like nozzles.
Avoid continuous baking without 10-minute cooling breaks to prevent overheating, a feature in models like the Brentwood TS-254. Clean and store accessories properly to maintain their quality. Following these maintenance tips ensures your cake maker and tools stay reliable for years.
Cake Maker Safety: Baking with Confidence
Cake maker safety is critical for worry-free use. Unplug the cake maker before cleaning or moving, and use oven mitts for hot surfaces. Keep it out of children’s reach during operation, and place it on a stable surface to avoid tipping. Never immerse the unit in water, and ensure accessories like metal nozzles are dry before use to prevent slips.
For a portable cake maker, secure the cord during travel to avoid hazards. Features like auto-shutoff or safety locks, found in models like the Aoruru Cake Pop Maker, enhance safety. These precautions ensure safe, enjoyable baking with your cake maker with accessories.
Cake Maker Tips: Getting Creative with Accessories
A cake maker with accessories unlocks endless creativity. Use included recipes for vanilla or chocolate pops, then experiment with flavors like red velvet or lemon. The piping bag and nozzles make decorating easy—try swirls, stars, or dots with icing. Cake maker tips: Add sprinkles or edible glitter (sometimes included) for flair, or use silicone molds for shaped treats like hearts or stars.
Freeze undecorated pops for later, and use the cooling rack to set dipped treats. For parties, create themed designs with included cutters or toppers. The accessories make how to bake with a cake maker fun and professional, perfect for bake sales or celebrations.
Final Thoughts on the Cake Maker with Accessories
This cake maker with accessories review highlights the convenience and versatility of these all-in-one devices. From easy cake maker setup to intuitive how to use a cake maker steps, they deliver professional results with minimal effort. Cake maker troubleshooting, cake maker cleaning, and cake maker maintenance are straightforward, ensuring durability. With cake maker safety features and a portable cake maker design, these machines are perfect for any setting.
For effortless, creative baking, a cake maker with accessories is an excellent choice. Explore more ideas with the best cake maker guide and start crafting delicious treats today.